Howto: Setup wordpress blog on a home server? November 26, 2007
Posted by Mayank in home server, Wordpress.Tags: airtel broadband, beetel 220bxi, enom, google apps, home server, Wordpress
trackback
I’ve been wanting to do this for a long time and this flu I got over the weekend gave me that chance ! :-).
This blog (powered by wordpress 🙂 ) is hosted from my home pc. While most of the setup was a breeze with instructions readily available I faced problems in setting up the port forwarding (NAT) on my ISP provided router/modem. I’ll brief you through the process while paying special attention to the networking setup where I didn’t find much help..
1. Get the wordpress tar.gz from http://www.wordpress.com
2. Setup LAMP, WAMP, MAMP or any other xAMP ! 🙂 …
AMP is short for Apache MySQL PHP. The first character is chosen based on the OS one choses, viz. Linux Windows MAC, etc
3. Now go through the famous 5 minute wordpress installation, and believe me that is really a 5 minute install.
One word of caution, on one of the configuration pages you might be tempted to change the “WordPress Address (URL)”, “Blog Address (URL)”, **don’ do that** just yet. You’ll get locked out of your setup and would be needed to get into the MySQL database to fix it. However, later I also found a PHP script which can help you bail out of this situation.
4. Nows the part where you don’t find much help. For your site to be accessible from the external world, your home server needs to be seen on the internet. Typically most modern routers have firewalls built into them which keep your internal network secure (typically your home pcs behind the router).
In order to make your wordpress blog available on the internet, you should begin by opening a port on the router and asking the router to forward all requests received on this port to your home server. This is usually available as a setting called port fowarding or NAT.
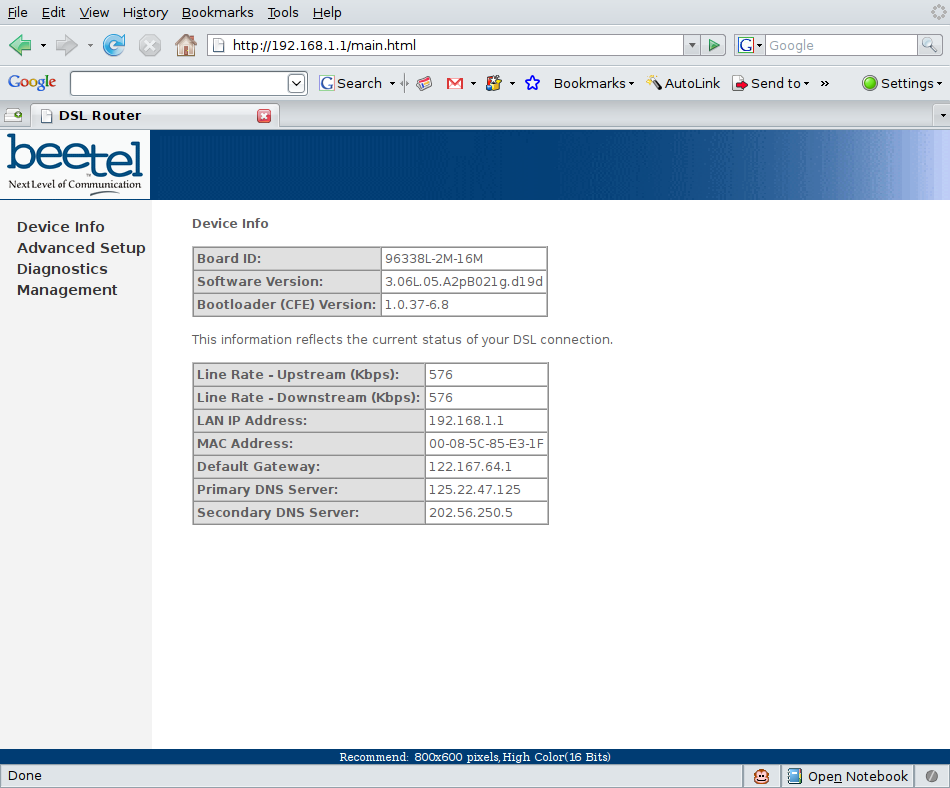
Since I set this up on my airtel broadband connection, I’ll give some specifics about that to help other airtel broadband users. I got a Beetel 220BXI modem/router with my broadband connection. The configuration page of the router is generally available at http://192.168.1.1. If you are unsure of your routers ip address you could also go to http://whatismyip.com from your pc and use http://<ipaddress shown on whatismyip.com> The default access credentials for the router are admin/password.
The advanced settings of this router are not directly accessible. Once logged in, type the following url in your browser – http://192.168.1.1/main.html.
This should take you to the advanced settings page where you can complete the NAT setup.
Router – Advanced Settings Page
Router – NAT Settings Main Page
Router – NAT Settings completed!
5. Once you’re done with the NAT setup, your wordpress blog hosted on your home server should be visible outside. You can use this link to find out if your port is open now … https://www.grc.com/x/portprobe=80.
6. To allow user friendly url based access to your site, you can first get a Dynamic DNS.
7. If you don’t have a static ip address then read ahead. Map the dynamic dns account to the external ip address of your router (the one you got from whatismyip.com). You might want to setup a ddns client which will keep dyndns.org updated with your ip address everytime your ip address changes.
8. Finally, you can register a domain name (I used enom via google apps as it provided whois privacy for free) and point it to your static ip address if you have one or the dynamic dns name (the one you created in the last step).
9. We’re left with one final thingy .. since your home pc usually does not have a dns name it can become a problem to enable access to the blog to the external world as well as the world on your side of the router. So you can edit /etc/hosts and add and entry which looks something like this:
192.168.1.5 http://www.geekzguru.net geekzguru.dyndns.org
10. edit httpd.conf and add “ServerName geekzguru.dyndns.org”
11. restart networking and apache.
Your blog should now be easily accessible both internally and externally :-).
Happy blogging!


very interesting.
i’m adding in RSS Reader
Interesting information thanks for writing
good to know that this helped someone …
I have visited this site on many an occasion now but this post is the 1st one that I have ever commented on.
Congratulations on such a fine article and site I have found it very helpful and informative – I only wish that there were more out there like this one.
I never leave empty handed, sometimes I may even be a little disappointed that I may not agree with a post or reply that has been made. But hey! that is life and if every one agreed on the same thing what a boring old world we would live in.
Keep up the good work and cheers.
Thanks for this Interesting Info.
http://www.ipmango.com
thanks for this info, remind me about mapping my internal IP with my ddns..I just add as per your suggestion on no. 9..without it, I can’t access my wordpress inside my router (local lan) but can access from outside..
Thanks again..
thanks a bunch! i am looking to host my wordpress blog on my home computer just to see if i can do it. its the php and mysql that really scares me. im going to install ubuntu and go from there. ill let you know how it turns out!
good info.thanks!
Hi there, I was able to install the wordpress blog on my home server. However, I am finding that I am unable to add the widgets to my themes. The area to which you can drag your widget to, for it to appear on your blog doesn’t appear on my widget admin page. Anyone else had this issue? If so how did they fix it?
I actually found this blog while trying to fix my own computer. Not related to my orginal problem that i was looking to fix, but still a nice read. I reckon computers are made to die within a year of buying them, makes us have to spend more money getting a new one!
Greatinformation. I thought about doing this for my class website and not having to really pay for anything. I’ll probably be back often. Cheers!
Great site. Going to need a decent amount of time to think over this stuff!!
I, not long ago came throughout this site and also have enjoyed the content. I look forward to long term content and can definitely hyperlink to this and tell the folks I understand. Thank you.
After going over a handful of the articles on your web site,
I honestly like your technique of writing a blog. I added it to my bookmark site list and will be checking back soon. Please check out my web site too and tell me
what you think.